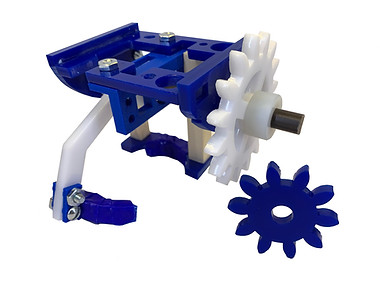
The Swinging Gripper
Skills: SolidWorks, Rabbit Laser Cutter, Ultimaker, Machine Shop

Teams of four to five members were given a $300 budget for use over two testing days to design and manufacture a gripper that would support an artifact over two full swings of an arm.
Team Members:
-
Vivek Anand
-
Lori Kipp
-
Ginny Liu
Our manufacturing process began by first modeling all of our components digitally using SolidWorks. From there, we used a Rabbit Laser Cutter to cut out some of our parts, such as the gears and the main base frame of our gripper, while we used an Ultimaker 3D printer to manufacture other components, such as the clamper that would contact the artifact. Other components of our design were obtained through McMaster-Carr and either used as is or machined to fit our design through the use of band saws and belt sanders.


One of the project goals was to manufacture a gripper that would complete the project objectives while having minimal weight. On the left is our gripper from Test Day 1, while on the right is our gripper from Test Day 2. The concept behind our gripper designs were quite similar, as we were focused on reducing weight while retaining function between the two test days.
This is a video of our team running our final gripper design on the rig during Test Day 2. The testing process consisted of a constraints check, to determine if the gripper was designed within project specifications, a function test, to demonstrate that the gripper could open and close without failing, and a performance test, to check if the gripper could hold onto the artifact through two full swings without significant slipping. Our team was one of only four teams in the entire class to pass all checks on both test days.